03. EC2 Instance
03. EC2 Instance
EC2
Prerequisites
1. EC2 Instance
EC2 is one of the most fundamental services in AWS. It provides Virtual servers in the cloud EC2 allows you to run applications on virtual machines without owning physical hardware.
Instead of:
- Buying servers
- Installing OS
- Managing hardware
👉 You simply:
- Launch an instance
- Choose specifications
- Start using it immediately
In EC2, a server is called an instance. It behaves like a real server, but it is virtual.
Each instance includes:
- CPU (vCPU)
- Memory (RAM)
- Storage (EBS)
- Network capability
2. How EC2 works
1
2
3
4
[ Physical Server (AWS Data Center) ]
 ├── EC2 Instance (User A)
 ├── EC2 Instance (User B)
 └── EC2 Instance (User C)
👉 Multiple users share the same hardware 👉 Each instance is isolated
AMI is a template used to create instances.
It includes:
- Operating System (Ubuntu, Amazon Linux, etc.)
- Pre-installed software
- Configuration
Think of it as A snapshot of a ready-to-run server
2-1. Basic steps
- Choose AMI (OS)
- Select instance type (CPU/RAM)
- Configure network (VPC, subnet)
- Add storage
- Configure security group
- Launch instance
2-2. Networking
EC2 does not exist alone.
It is placed inside:
- VPC (Virtual Private Cloud)
- Subnet (public / private)
| Type | Description |
|---|---|
| Public | Accessible from internet |
| Private | Internal only |
- Security Group
- Route Table
- Internet Gateway
2-3. Security Group
Security Group acts as a firewall.
| Port | Purpose |
|---|---|
| 22 | SSH |
| 80 | HTTP |
| 443 | HTTPS |
👉 Only allowed traffic can enter
2-4. Key Pair (Login)
To access EC2:
- Use SSH (Linux)
- Use Key Pair (.pem)
1
ssh -i key.pem ubuntu@<public-ip>
👉 Password login is not used by default
2-5. Pricing Model
EC2 is pay-as-you-go:
- Charged per usage time
Different pricing models:
- On-Demand
- Reserved
- Spot
| Scenario | Recommended |
|---|---|
| Testing / short-term | On-Demand |
| Batch / non-critical | Spot |
| Stable production | Reserved / Savings Plan |
| Compliance required | Dedicated |
3. How to create EC2
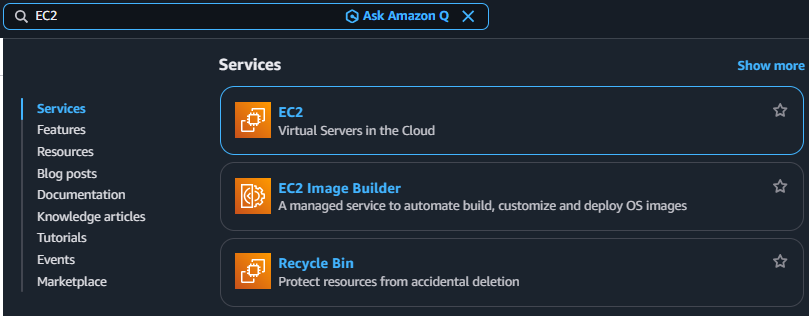
3-1. Search EC2
3-2. Click Navigation pane → “Instances”
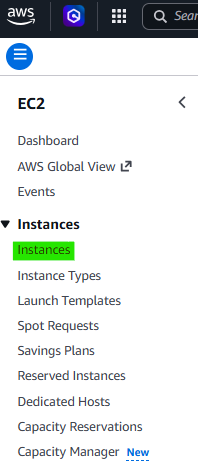
3-3. Click Button → “Launch instances”

3-4. Step 1. Set Environments (Hardware)
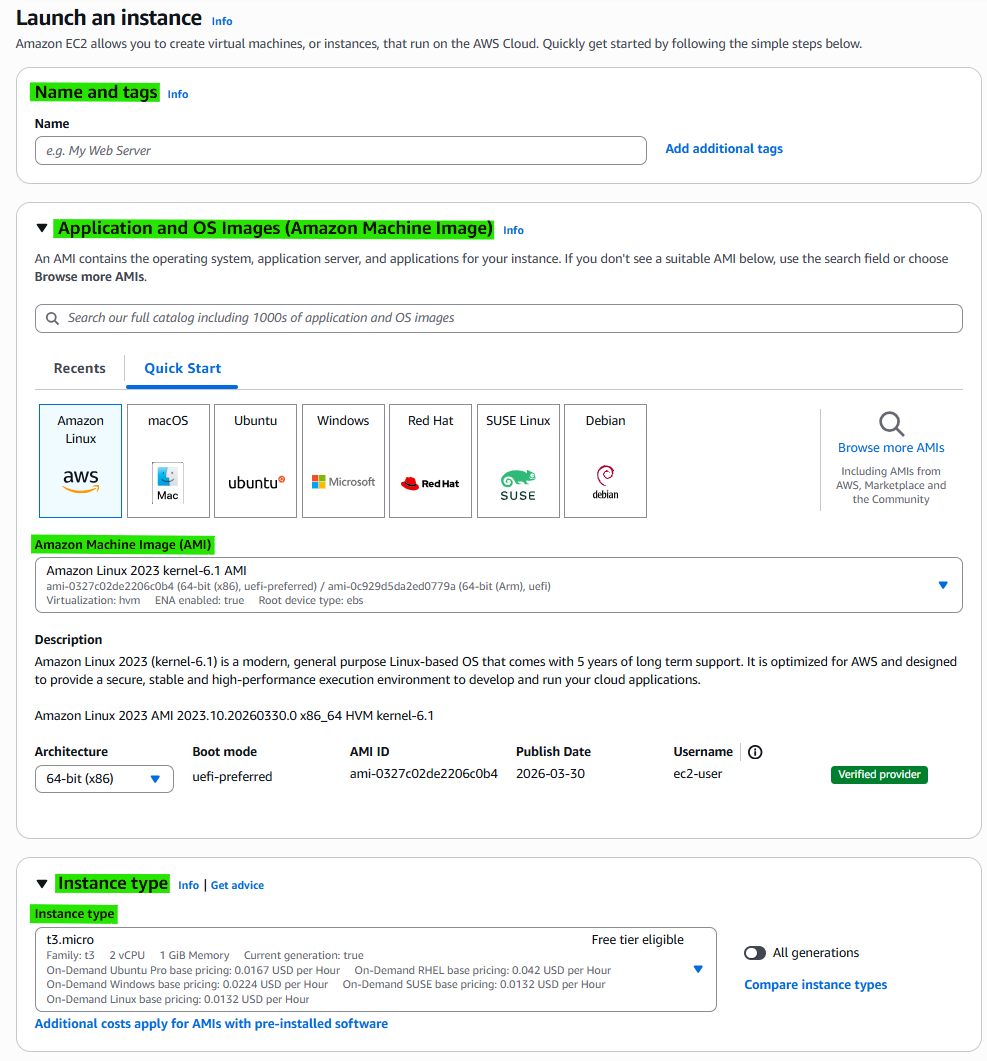
- Name and tags: EC2 name
- Application and OS Images (Amazon Machine Image): Select AMI
- Instance type: hardware configuration
| Type | Description |
|---|---|
| General Purpose | Balanced CPU & memory |
| Compute Optimized | High CPU performance |
| Memory Optimized | Large memory capacity |
| Accelerated Computing | GPU / FPGA based |
- More CPU → faster computation
- More memory → better data handling
- Higher network bandwidth → faster communication
- Higher EBS bandwidth → faster storage I/O
3-5. Step 2. Set Environments (Security)
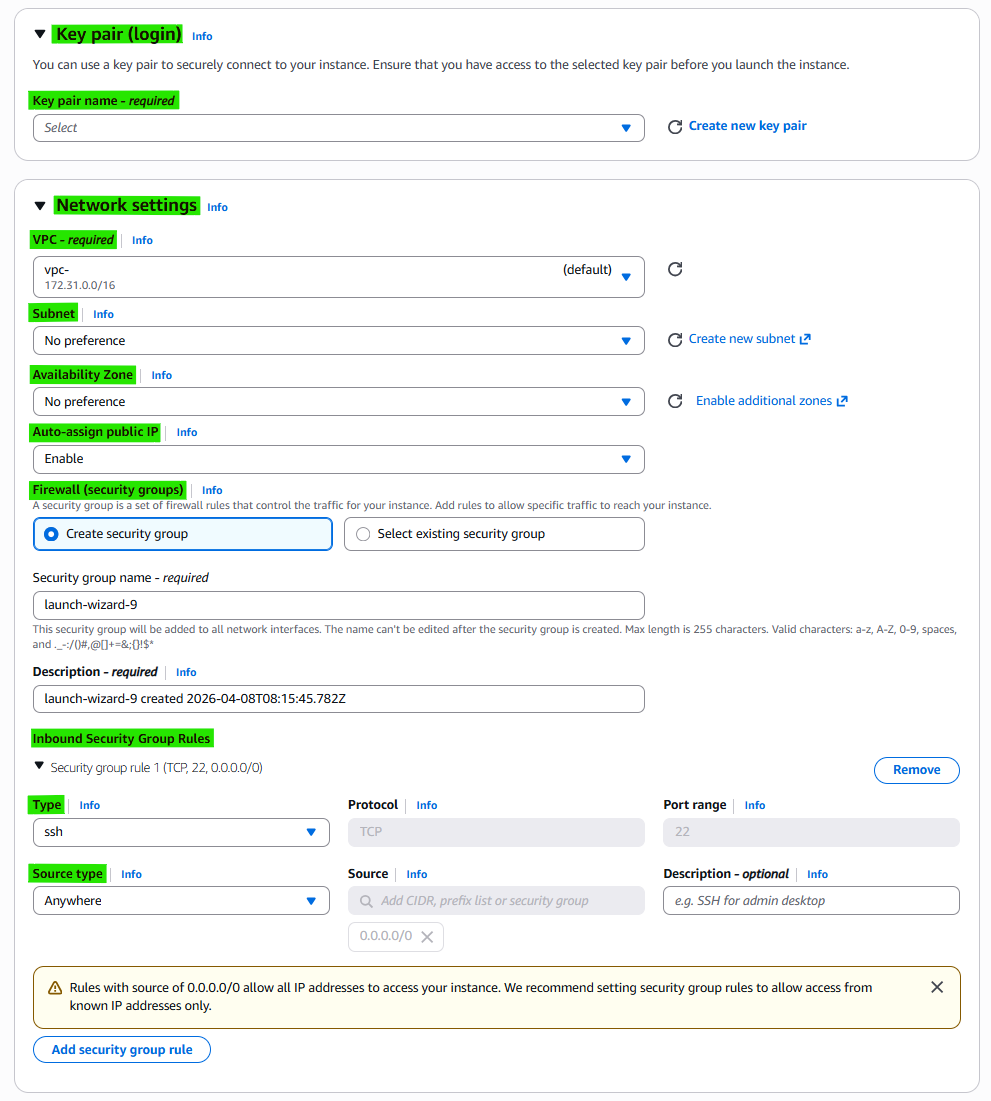
- Key pair
- Network settings
- VPC
- Subnet
- Public subnet
- Private subnet
- Availability Zone
- Select AZ
- Auto-assign public IP
- Enable(Pulbic EC2)
- Disable(Private EC2)
- Firewall (security groups)
- Inbound Security Group Rules
3-6. Step 3. Set Environments (Storage)
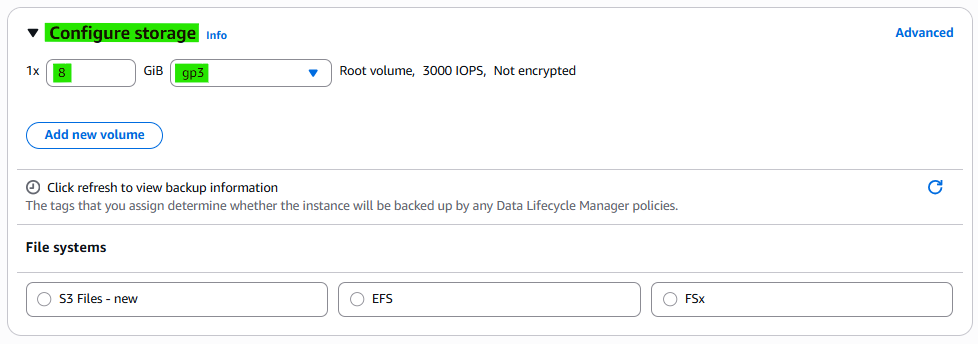
- Storage
3-7. Launch Instance
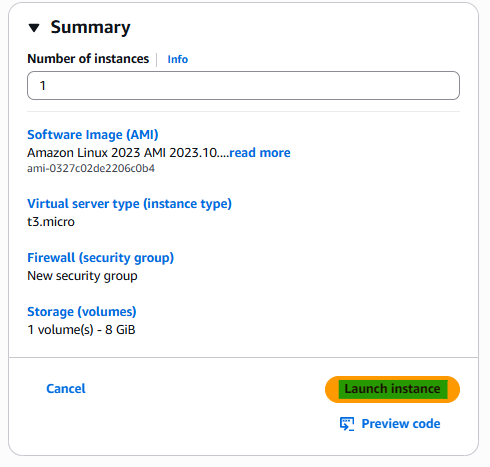
3-8. Confirm Instance

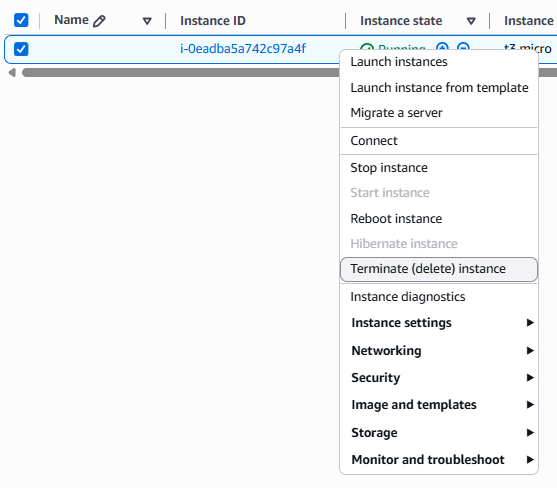
3-9. Start/Stop/Reboot/Terminate Instance
4. Related Concepts
- Automatically Management
- Load Balancing
- Target Groups
- Auto Scaling Groups
- Storage
- Elastic Block Store(ELB)
- Snapshots
- Images
- AMIs
Template
- Networks
- Elastic IPs
This post is licensed under CC BY 4.0 by the author.